After cutting out, marking your fabrics with the pattern symbols is your next step. As mentioned in my ‘Pattern Preparation and Cutting Out‘ post, I like to leave the paper pattern pieces attached to my fabric until I am ready to use them. This means that I always know what the piece is, and I can double check that I have transferred all markings.
Whether you do all the markings before you start sewing or mark each piece before you use it is down to personal choice. I tend to do the latter as I don’t want to risk the marks rubbing off or tailor tacks being pulled out accidentally.
So, the first question is what markings need to be transferred onto the fabric?
Markings and symbols to transfer onto your fabric pieces
Notches
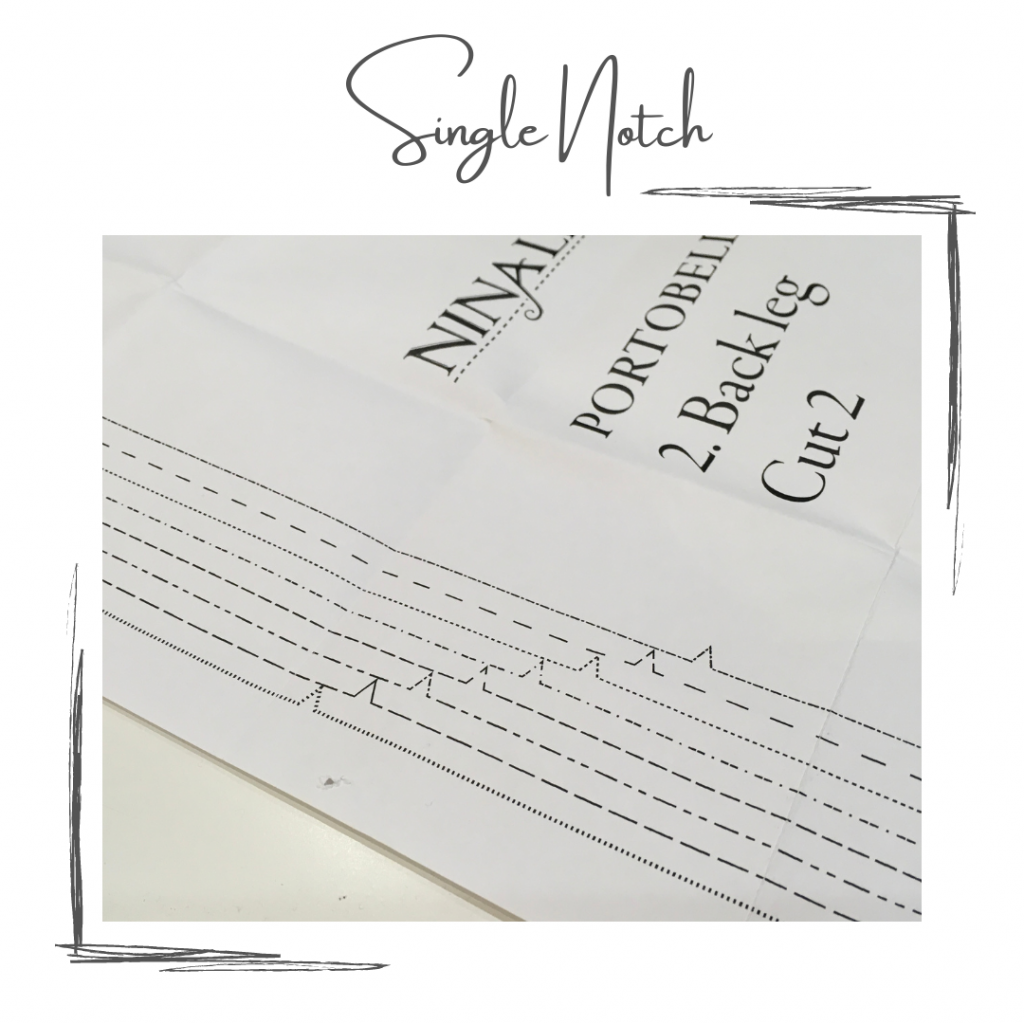
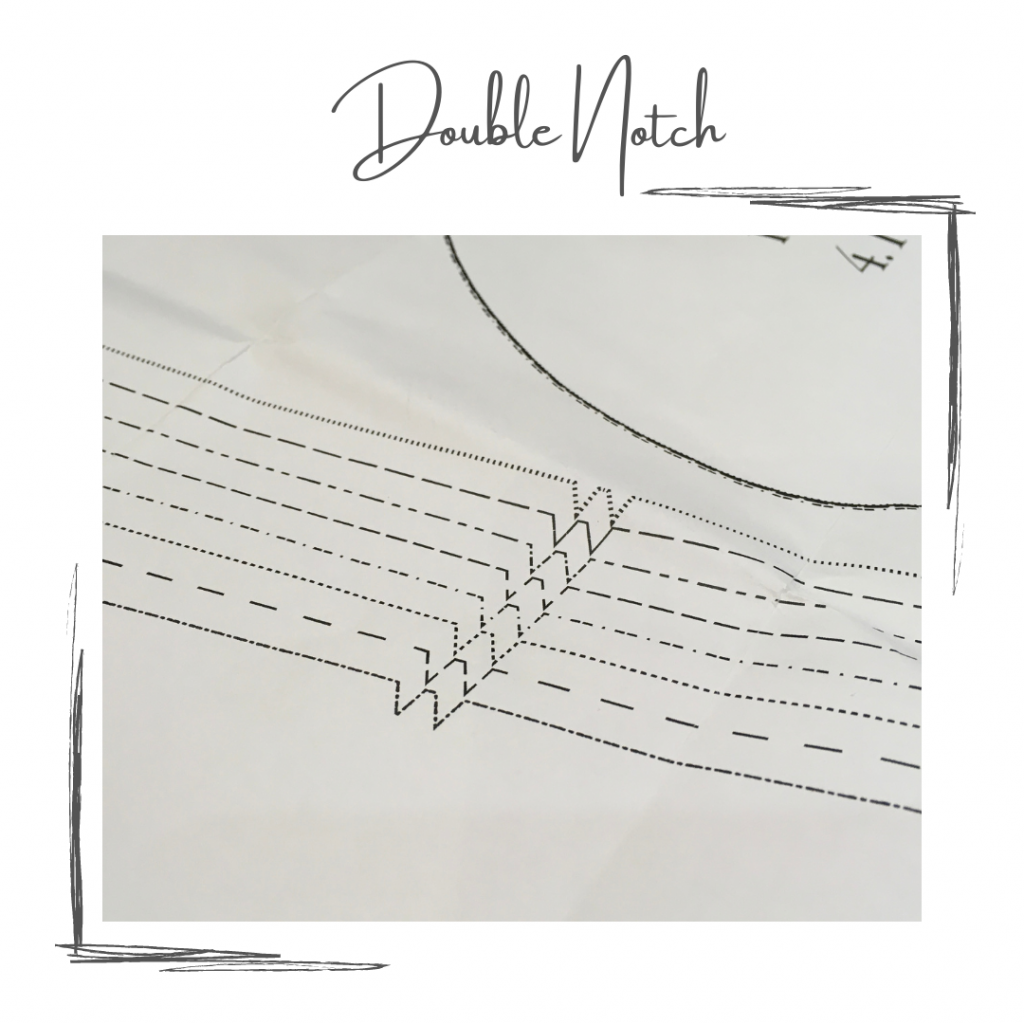
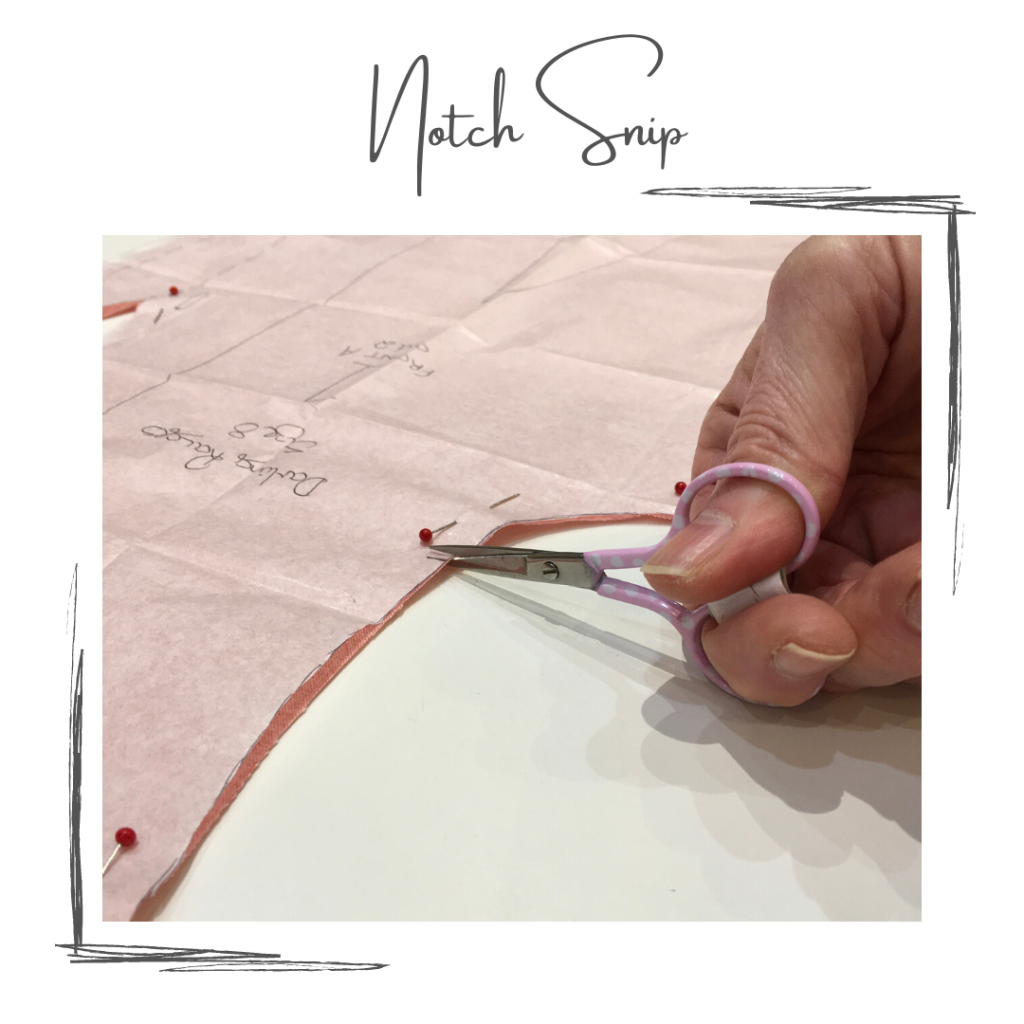
These are the first things to look for and are shown as small lines perpendicular to the cutting line or as small triangles.
Why are notches important? They assist with matching two pieces of fabric together before sewing and help the pattern pieces fit together accurately.
Sometimes there is more than one notch grouped together and it is important to mark all of them.
Top Tip: Single notches are used on the front of the garment. Double notches are used to show seams on the back of the garment, for example, on a centre back seam or where the back of the sleeve head joins the back of the armhole.
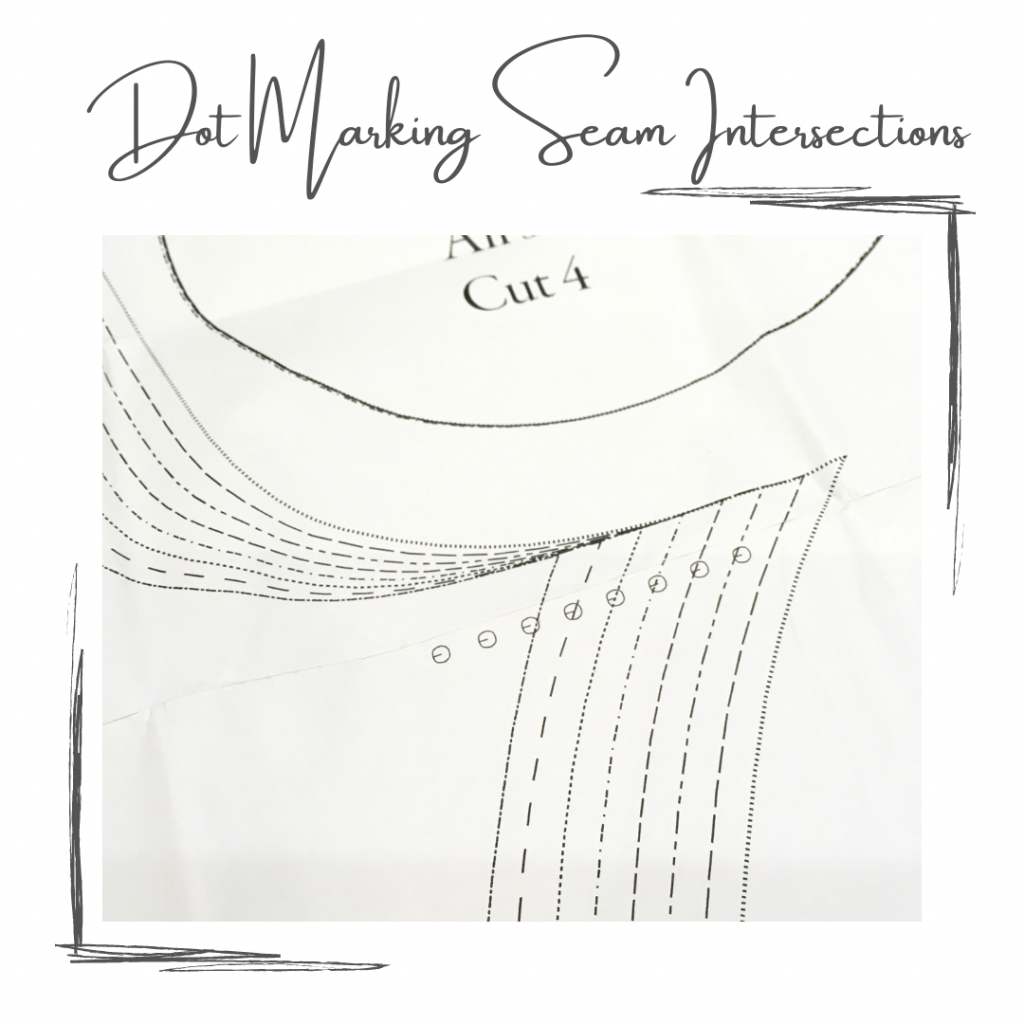
Dots
The next thing to look for are dots. These may be shown as solid dots or small circles and they are important because they show where to stop/start stitching. They can also indicate the point of a dart or where the fabric needs to be matched up with a seam or another dot.
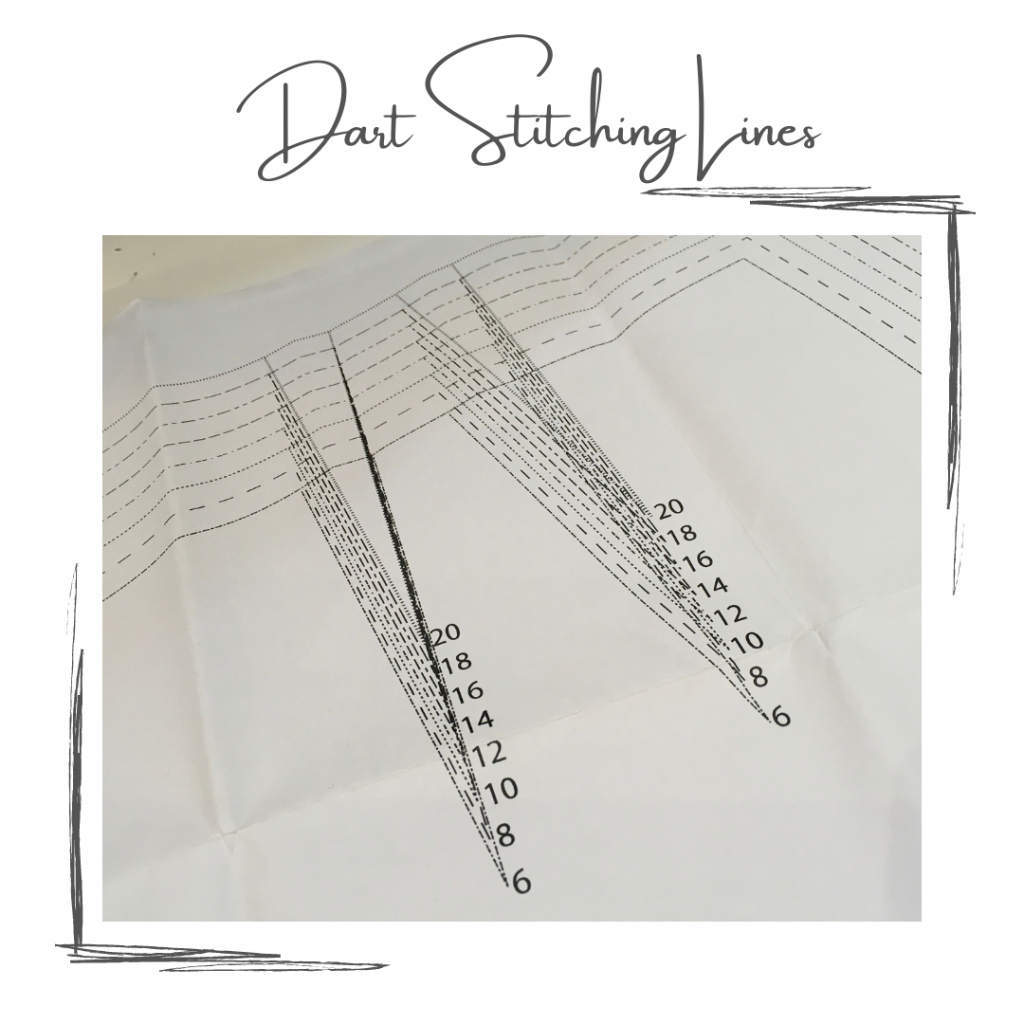
Stitching Lines
You will usually find these where there are darts or pleats. Sometimes they will be on necklines too.
They are a useful stitching guide and help with accuracy and sewing straight lines!
Methods of Marking Fabrics
Snips
Snipping into the fabric is commonly used to mark notches. Although they can also be marked with chalk or marker pen, the easiest way is to make a small 5mm / ¼” snip into the fabric. The snip will be well within the 1.5cm / ⅝” seam allowance and not affect your stitching. However, if you only have a 5mm / ¼” seam allowance, marking with chalk or marker would be best.
The important thing here is to make sure you don’t snip too far into the fabric.
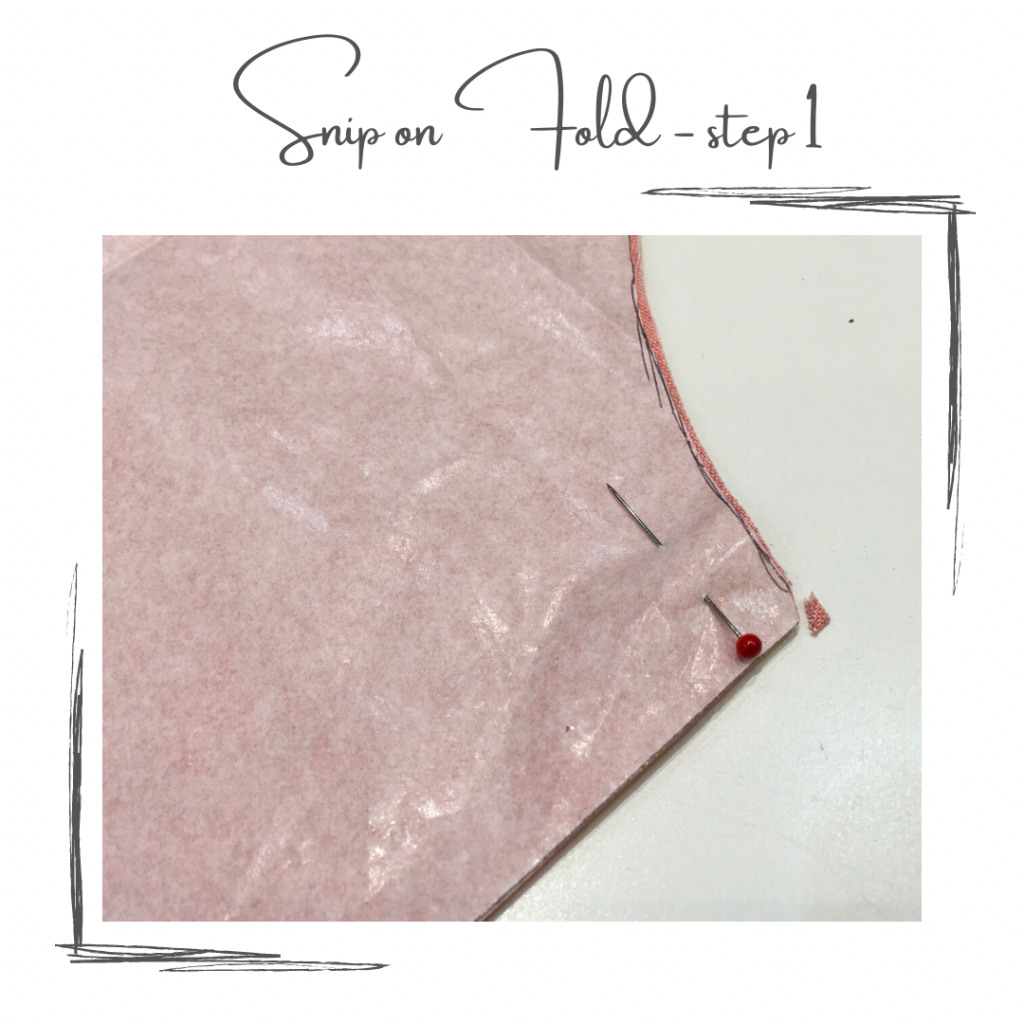
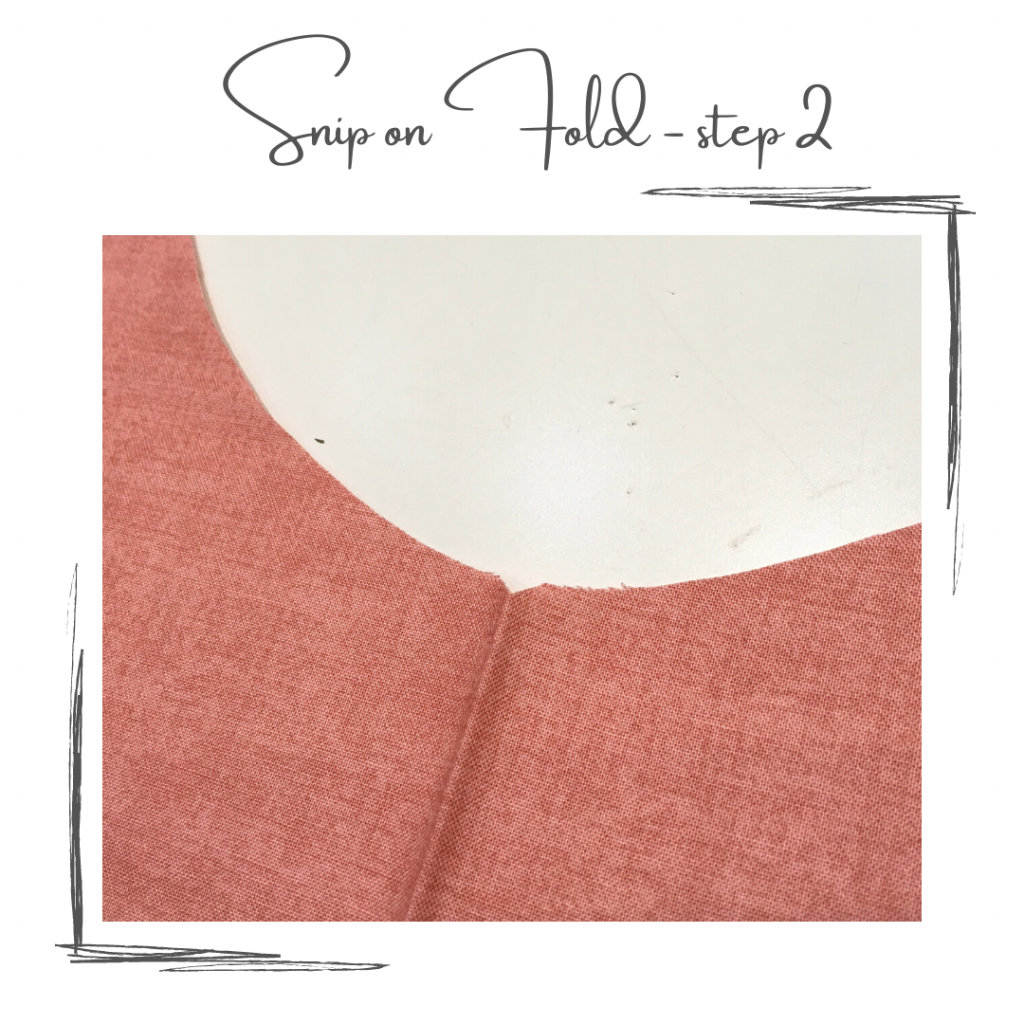
Top Tip: When a pattern piece is cut on the fold, it is also useful to mark the top and bottom of the fold by snipping diagonally across the fabric to create a small triangle. This helps when matching facings to a neck edge, skirts to a bodice, etc.
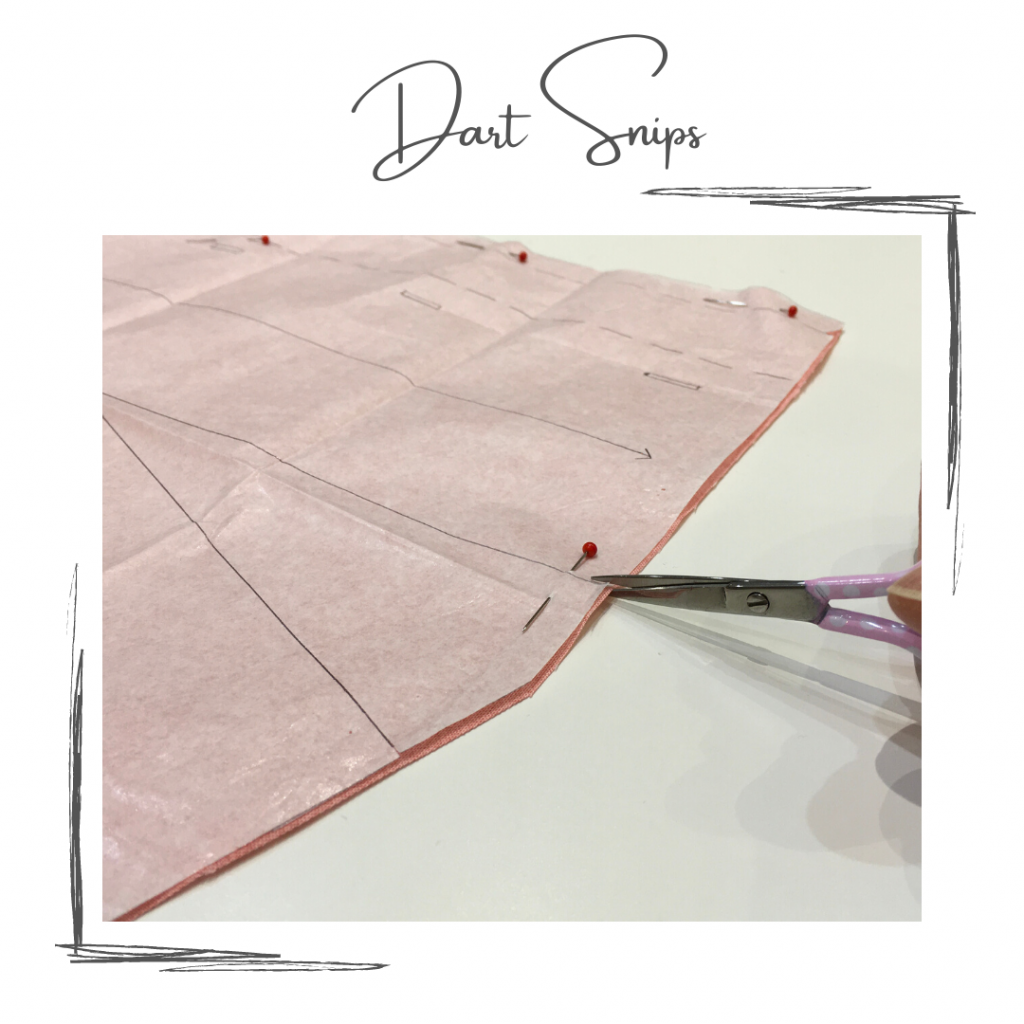
I also find it handy to make small snips to mark end of the stitching line for darts. The same applies to the fold lines for pleats too.
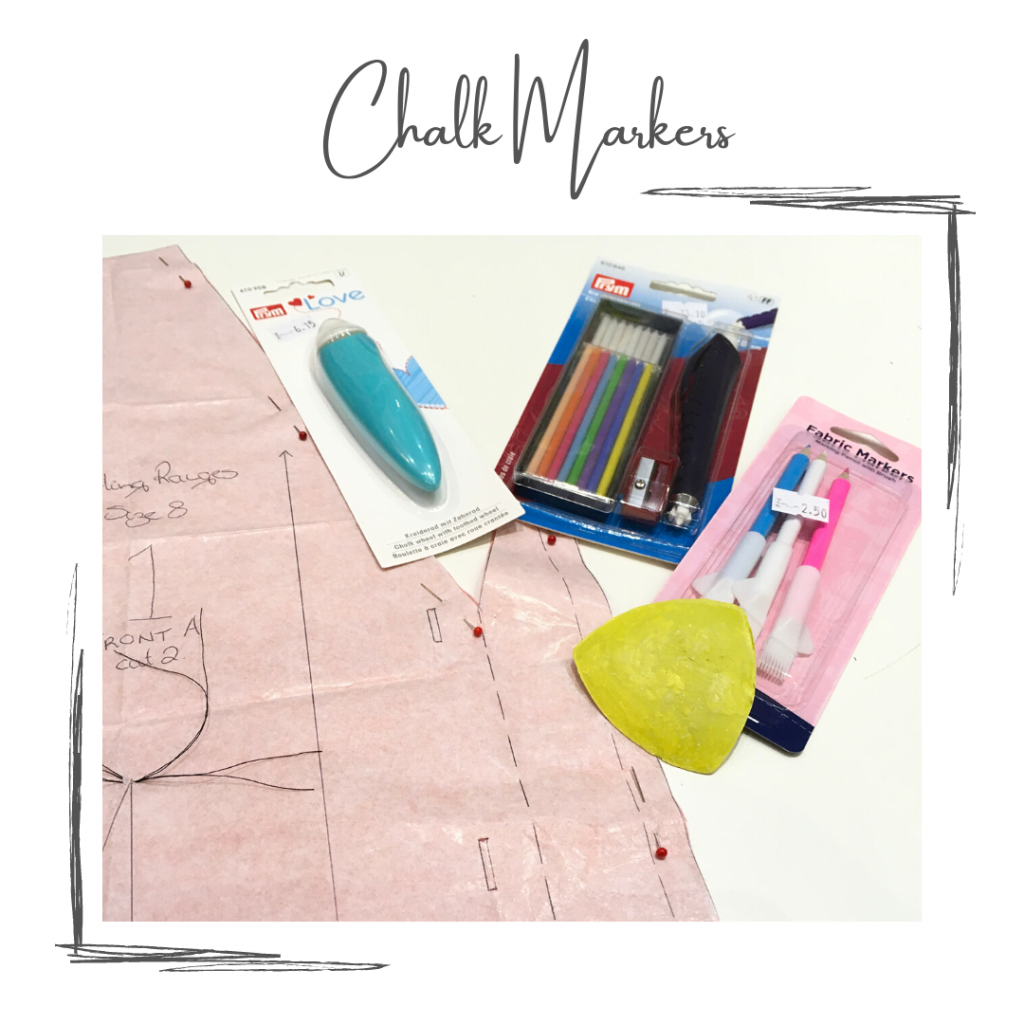
Tailor’s Chalk
Square or triangular blocks of chalk were traditionally used by tailors for marking fabrics, hence the name.
They come in a range of different colours and the marks are easily brushed off the fabric after sewing. It can be useful to have a sharpening block for when the edges go blunt.
The chalk also comes in other forms.
Different coloured pencils can be sharpened with a standard pencil sharpener. They draw clean lines and usually have a brush on the end for removing the marks.
Chalk wheels have refillable cartridges containing powdered chalk and are best for marking lines.
My favourite marking tool is the cartridge pencil set that has chalks in different colours that are easy to change. The chalks can be sharpened and the eraser at the end removes any markings after stitching. This pencil allows lines and dots to be drawn accurately without too much pressure.
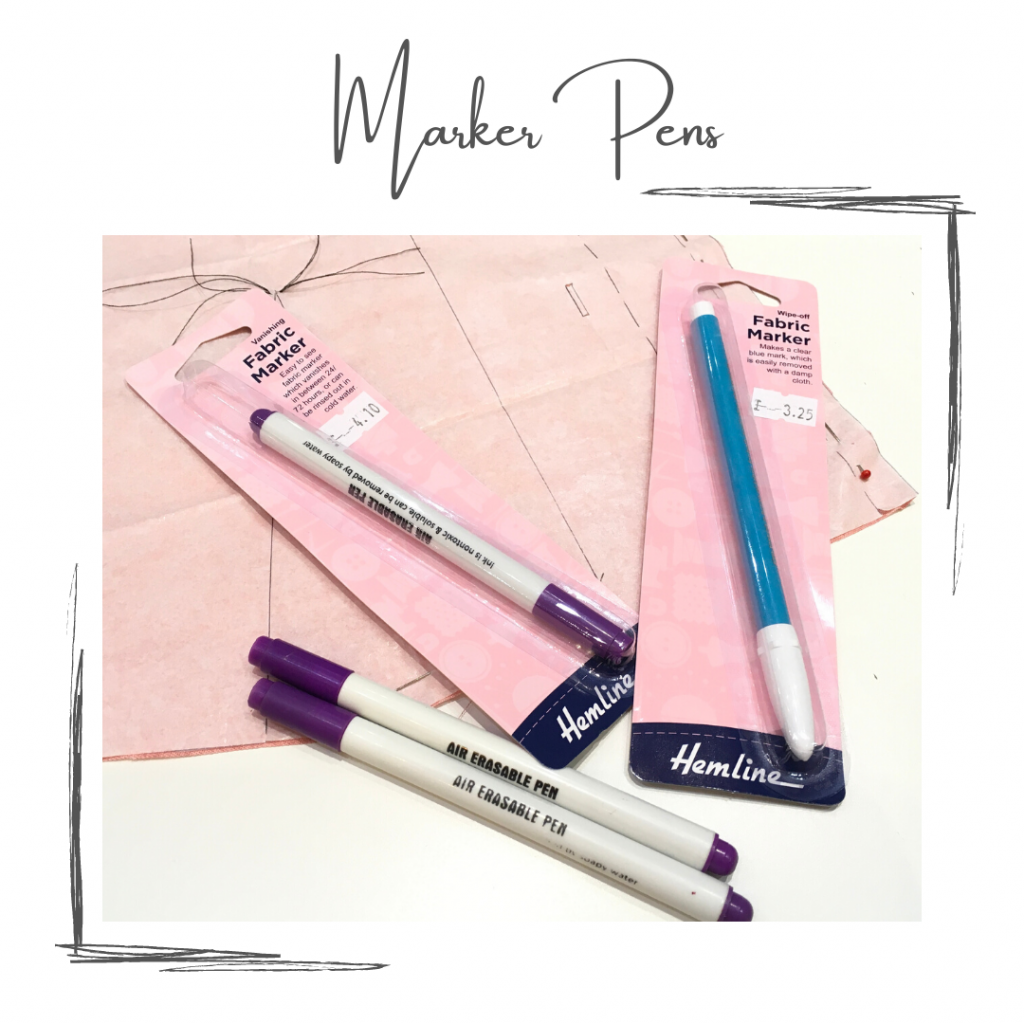
Vanishing Marker Pens
Vanishing marker pens are the perfect tool for temporary markings. However, the marks do disappear withing 24 to 72 hours so only make the marks shortly before needing them.
The marks can also be removed with a damp cloth or by rinsing the fabric in cold water.
As a cautionary note, make sure to remove the marks before ironing or doing a hot wash.
It is advisable to test the pen on a scrap of fabric first.
Wipe-off Fabric Markers
The wipe-off fabric markers are very similar to the vanishing pens, but the marks need to be removed within 30 days with a damp cloth prior to ironing or hot washing the fabric.
This is a useful marker for quilting, embroidery and stitching on fabrics.
Again, test it out on a scrap of fabric first.
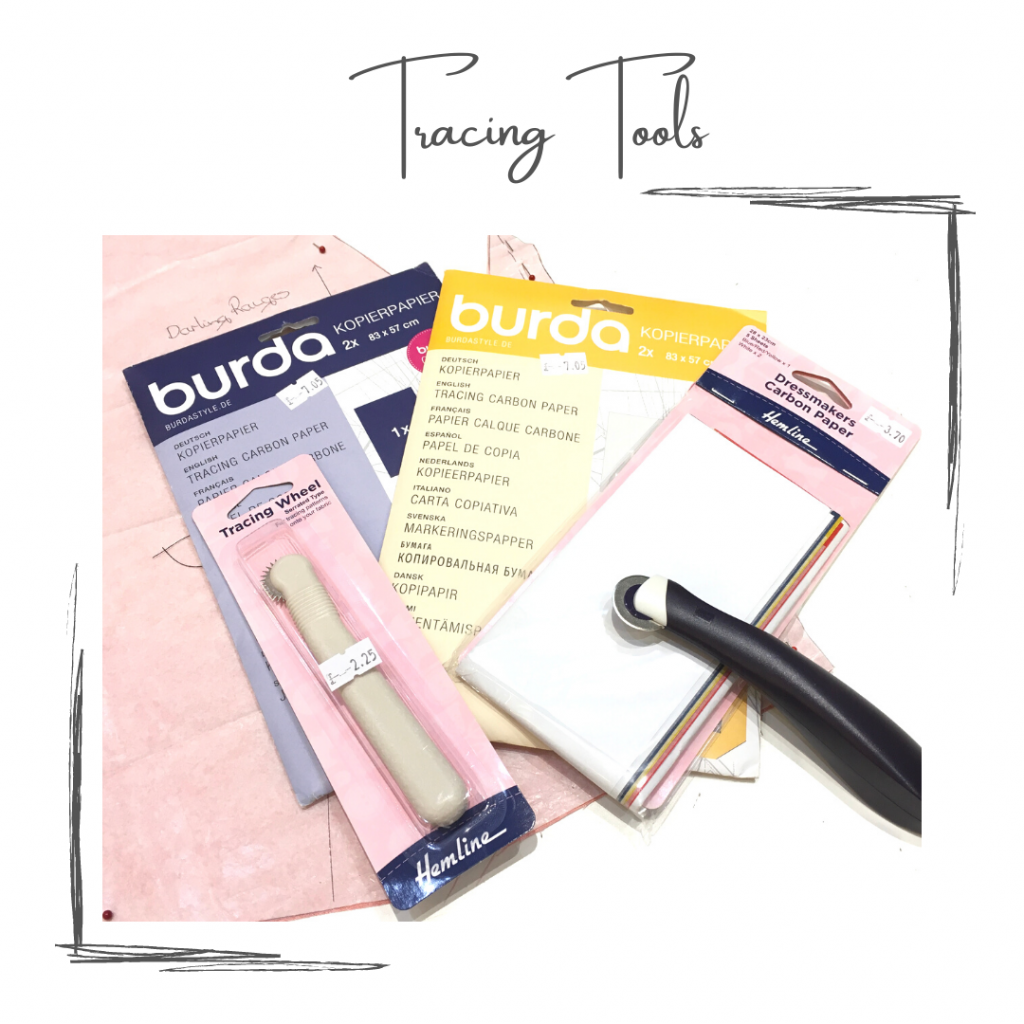
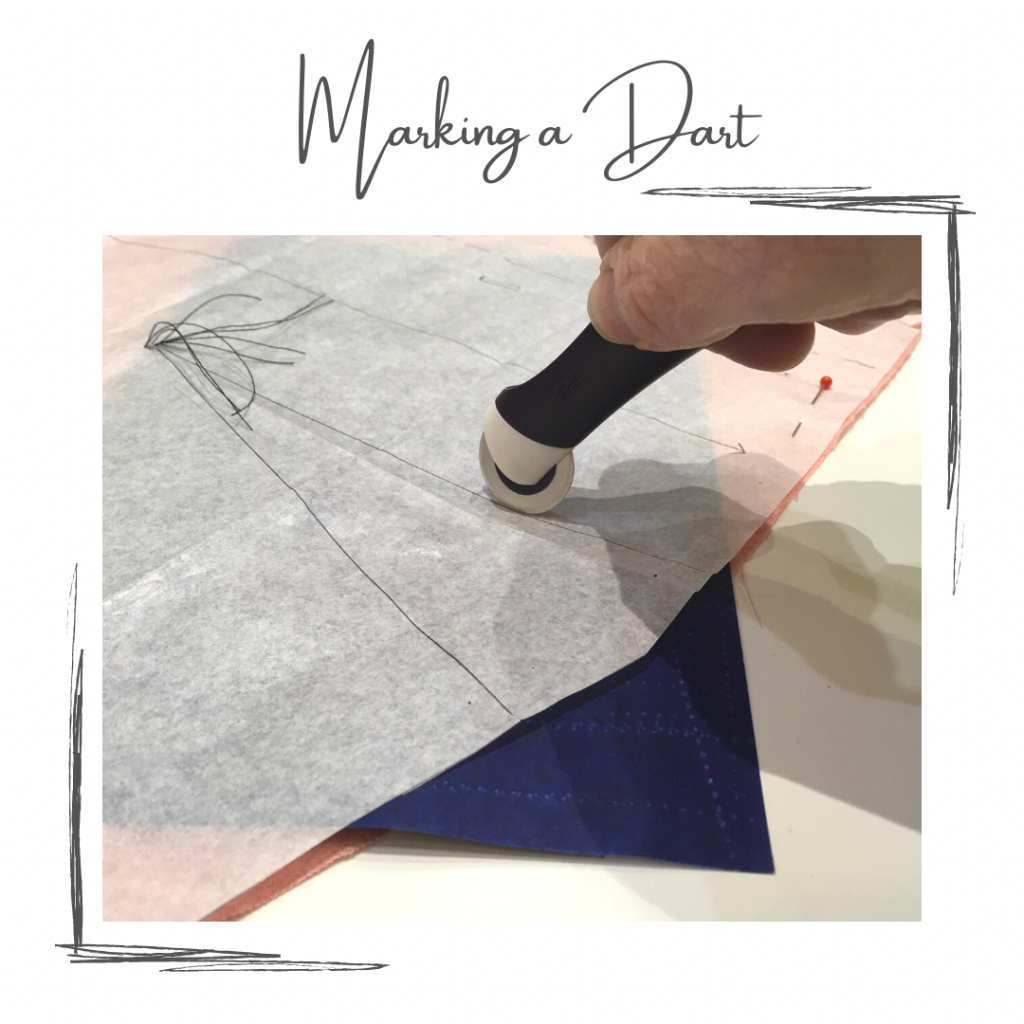
Dressmaker’s Carbon
Often a popular choice, dressmaker’s carbon has three uses: –
Tracing a pattern directly onto the fabric before cutting out,
Transferring pattern lines and markings from the pattern onto the fabric, and
Tracing a pattern onto tracing paper.
The carbon paper is available in different colours and sizes and is placed face down on the wrong side of the fabric.
Using a tracing wheel is the easiest way to transfer the markings and there are two different types: –
A serrated wheel leaves a dotted line and is great for a single use pattern. It leaves holes in the paper pattern thereby weakening the pattern pieces, and
A smooth wheel leaves a sold line and is kinder to the paper pattern.
The carbon marks will wash out of the fabric.
Frixion Pens
Frixion pens are a popular choice as the marks disappear when ironed.
They are very handy but they as they are not designed to be used on fabrics it is wise to be cautious. Only use them on the wrong side of the fabric as the marks may reappear over time and they could cause some fabric discolouration.
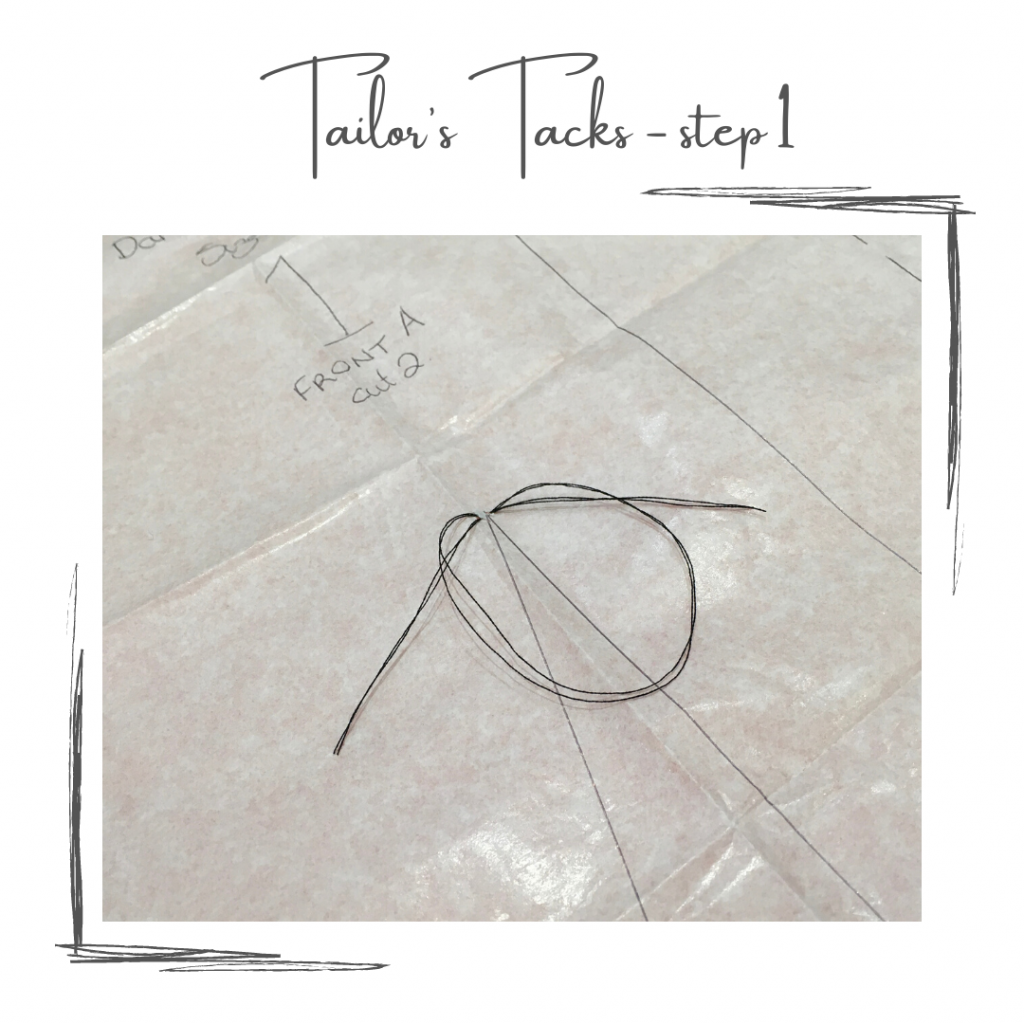
Tailor’s Tacks
One of the traditional methods of marking fabrics is to use tailor’s tacks. This is particularly useful for marking dots or points.
Using a hand sewing needle and two strands of low grade thread, insert the needle through the pattern and all layers of fabric.
Leave a tail of thread at least 5cm / 2” long and at a point 2mm / 1/8” away, bring the needle back through the fabric and pattern to the front.
Go back down through the pattern at the first point, making sure to leave a loop of thread at least 10cm / 4” long.
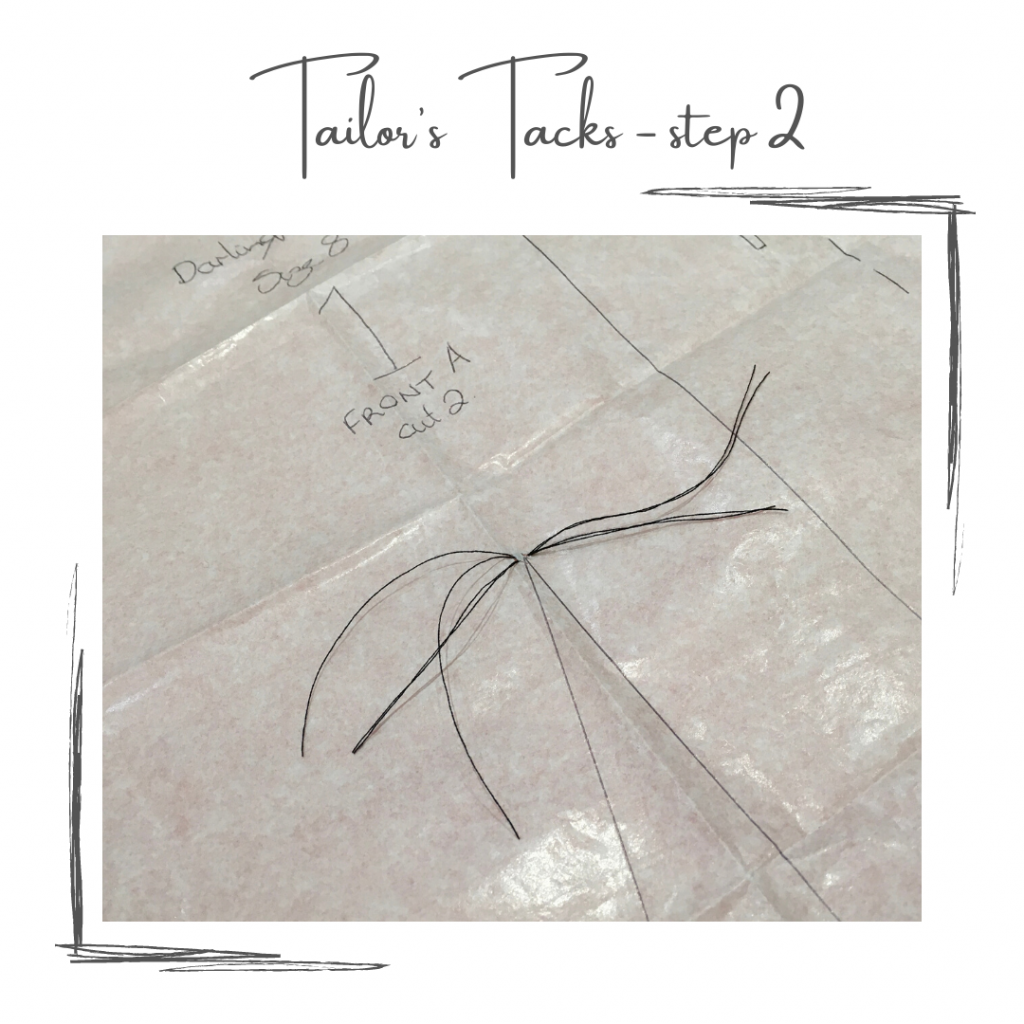
Bring the needle back up to the front again at the second point and cut the thread leaving a 5cm / 2” tail.
Cut the loop of thread in half.
Gently peel the pattern away and partially pull the fabric layers apart. Cut the threads between the layers so that they are an even length.
Top Tip: use up bobbins of unwanted thread.
Tacking Stitch
Using a tacking stitch for marking stitching lines is another traditional method.
Tack along the stitching line through the pattern and fabric, tear the pattern away and the use the stitches as a guide for machine sewing.
This method can only be used for marking one layer of fabric.
You are now ready to start sewing!
I hope you have found this useful and would love to hear your comments.
For the purpose of this blog I used photos of the Portobello trousers pattern from Nina Lee patterns and a traced version of the Darling Ranges dress pattern from Megan Nielsen patterns.
We stock a variety of Hemline and Prym marking tools, some of which have been used in these examples.
Enjoy your sewing and until next time,
Leanne
Leanne de Lima Araujo is the owner of Gather ‘N’ Sew where she teaches popular sewing workshops.